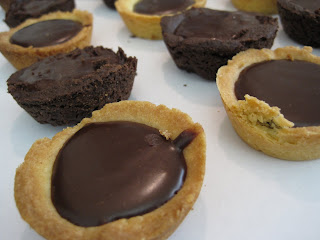
Sweet Tart Dough
- 1 ½ cups all-purpose flour
- ½ cup confectioners’ sugar
- ¼ teaspoon salt
- 1 stick plus 1 tablespoon (9 tablespoons) very cold (or frozen) unsalted butter, cut into small pieces
- 1 large egg yolk
Put the flour, confectioners’ sugar and salt in a food processor and pulse a couple of times to combine. Scatter the pieces of butter over the dry ingredients and pulse until the butter is coarsely cut in – you should have some pieces the size of oatmeal flakes and some the size of peas. Stir the yolk, just to break it up, and add it a little at a time, pulsing after each addition. When the egg is in, process in long pulses – about 10 seconds each – until the dough , which will look granular soon after the egg is added, forms clumps and curds. Just before you reach this stage, the sound of the machine working the dough will change – heads up. Turn the dough out onto a work surface and, very lightly and sparingly, knead the dough just to incorporate any dry ingredients that might have escaped mixing.
TO PRESS THE DOUGH INTO THE PAN: Butter a 9-inch fluted tart pan with a removable bottom. Press the dough evenly over the bottom and up the sides of the pan, using all but one little piece of dough, which you should save in the refrigerator to patch any cracks after the crust is baked. Don’t be too heavy-handed – press the crust in so that the edges of the pieces cling to one another, but not so hard that the crust loses its crumbly texture. Freeze the crust for at least 30 minutes, preferably longer, before baking.
TO FULLY BAKE THE CRUST: Center a rack in the oven and preheat the oven to 375 degrees F. Butter the shiny side of a piece of aluminum foil and fit the foil, buttered side down, tightly against the crust. (Since you froze the crust, you can bake it without weights.) Put the tart pan on a baking sheet and bake the crust for 25 minutes. Carefully remove the foil. If the crust has puffed, press it down gently with the back of a spoon. Bake for another 8 minutes or so, or until it is firm and golden brown – just make sure to keep a close eye on the crust’s progress – it can go from golden to way too dark in a flash.) Transfer the tart pan to a rack and cool the crust to room temperature before filling.
TO PATCH, IF NECESSARY: If there are any cracks in the baked crust, patch them with some of the reserved raw dough as soon as you remove the foil. Slice off a thin piece of the dough, place it over the crack, moisten the edges and very gently smooth the edges into the baked crust. Bake for another 2 minutes or so, just to take the rawness off the patch.
For the Filling:
- 8 ounces bittersweet chocolate, finely chopped
- 1 cup plus 2 tablespoons heavy cream
- ½ stick (4 tablespoons) unsalted butter, cut into 4 pieces, at room temperature
- 1 9-inch tart shell made with Sweet Tart Dough (From Baking: From My Home to Yours – recipe above)
Put the chopped chocolate in a heatproof bowl and have a whisk or a rubber spatula at hand.
Bring the cream to a boil, then pour half of it over the chocolate and let it sit for 30 seconds. Working with the whisk or spatula, very gently stir the chocolate and cream together in small circles, starting at the center of the bowl and working your way out in concentric circles. Pour in the remainder of the cream and blend it into the chocolate, using the same circular motion. When the ganache is smooth and shiny, stir in the butter piece by piece. Don’t stir the ganache any more than you must to blend the ingredients – the less you work it, the darker, smoother and shinier it will be. (The ganache can be used now, refrigerated or even frozen for later.)
Pour the ganache into the crust and, holding the pan with both hands, gently turn the pan from side to side to even the ganache. Refrigerate the tart for 30 minutes to set the ganache, then remove the tart from the fridge and keep it at room temperature until serving time. (Note – don’t cut right into it because the ganache won’t be set yet).


No comments:
Post a Comment