Tuesday, August 25, 2009

I love Muffins: Corniest Corn Muffins

I love muffins. Especially blueberry. And cranberry. And chocolate chip. And really any flavor. I love corn muffins, but often when you buy a corn muffin, you don't really get a lot of corn flavor and they are too sweet. These corn muffins, from the great Dorie Greenspan are different. They have a lot of corn flavor, thanks to stone ground cornmeal and actual pieces of corn and the texture is excellent. I made them in a muffin tin without wrappers and, with greasing the pan, they came out easily. What can I say other than, fresh corn season is almost over, so make these. I'm sure they would be good with canned corn or frozen corn, but they get a special pop from the fresh kernels (you don't have to cook them first, since they cook in the muffins). Yummy. Extra yummy toasted with a little butter (Dorie recommends honey butter, which I didn't make. I like the salty kick you get from regular butter).

Here is the recipe, from Baking from My Home to Yours:

Corniest Corn Muffins

Yield: 12 regular-sized muffins or 48 miniature ones

1 cup all-purpose flour
1 cup yellow cornmeal, preferably stone-ground
6 tablespoons granulated sugar
2 1/2 teaspoons baking powder
1/4 teaspoon baking soda
1/2 teaspoon salt
Pinch of freshly grated nutmeg (optional)
1 cup buttermilk
3 tablespoons unsalted butter, melted and cooled
3 tablespoons corn oil (I used olive oil since it was handy)
1 large egg
1 large egg yolk
1 cup corn kernels (add up to 1/3 cup more if you’d like) - fresh, frozen or canned (in which case they should be drained and patted dry)

Center a rack in the oven and preheat the oven to 400 degrees F. Butter or spray the 12 molds in a regular-size muffin pan or fit the molds with paper muffin cups. Alternatively, use a silicone muffin pan, which needs neither greasing nor paper cups. Place the muffin pan on a baking sheet.

In a large bowl, whisk together the flour, cornmeal, sugar, baking powder, baking soda, salt and nutmeg, if you’re using it. In a large glass measuring cup or another bowl, whisk the buttermilk, melted butter, oil, egg and yolk together until well blended. Pour the liquid ingredients over the dry ingredients and, with the whisk or a rubber spatula, gently but quickly stir to blend. Don’t worry about being thorough - the batter will be lumpy, and that’s just the way it should be. Stir in the corn kernels. Divide the batter evenly among the muffin cups.

Bake for 15 to 18 minutes (12 minutes for minis), or until the tops are golden and a thin knife inserted into the center of the muffins comes out clean. Transfer the pan to a rack and cool for 5 minutes before carefully removing each muffin from its mold.

Wednesday, August 19, 2009

OMGalettes!


PEACHES!


Peaches peaches peaches!


So juicy and delicious! I read somewhere (the New York Times Dining section?) that, while most produce has suffered from this summer's schizoid weather, this is a great year for peaches. So I went out and bought peaches at the Union Square Farmer's Market. Yellow peaches, white peaches- I don't discriminate.

Now, what to do with all these peaches? I was faced with a similar fruity dilemma, thanks to the five containers of blueberries in our fridge after my Farmer's Market binge. (It's just me and my dad in the house now, and much as we love blueberries, it's a little much.) Daddy suggested that I make pie, but since there's only two of us, I thought I should make something a little more manageable. Poof- galettes!

A lot of people don't seem to know what a galette is. It's sort of like a pie or tart, but instead of being made in a dish you just dump the filling onto a circular piece of dough and fold up the edges. The word most frequently used to describe galettes is "rustic." Take that to mean what you will, but I take it to mean that it's okay to be messy. Galettes are also nice because you can make them whatever size you want. I made one little one (which I ate), one medium-sized one (which my dad ate), and one big one (which is sitting in the fridge). It's kind of like Goldilocks, if the papa bear's bowl of porridge was sitting in the fridge.

The recipe was a joint effort between Tartelette and LaDue & Crew. I like Tartelette a lot but usually I'm too intimidated to try her recipes, because they look so elegant as to be inaccessible for a novice baker like me. Still, I had made the galette that I linked to for my college suitemates as a Valentine's Day treat, and they gave the dough rave reviews, so I decided I wanted to try it myself. As for LaDue & Crew, I had never heard of her, but it was the first result that came up when I searched "peach blueberry galette," and it looks like she has some yummy recipes! Yay the Internet!

I have to say, despite what my suitemates said, I wasn't sure the galette dough was worth it. It was pretty good but not amazing, and it's a female dog to make. Both times I just couldn't get it to cohere (even though this time I cheated and used a food processor for the first part). Instead, the middle of the dough was sticky, while along the periphery it was crumbly and crumbs spilled everywhere. In general it's really difficult to work with, so I think that next time I'll try a different dough. Still, the thing I liked most about it was that it wasn't too sweet, so it didn't overpower the natural sugars in the fruit.

The filling was delightful, though I sort of made up the ratios. I didn't want to put in too much fruit because I knew I wasn't making many galettes, but I kept dipping in the bowl to eat the peaches! They were just so good! Anyway, I had a lot of leftover fruit at the end, so I just ate that. Om nom nom. I also added some cinnamon, which I think gave it a nice extra kick.

Overall, these were pretty fun to make, and a great summer treat. I did learn the hard way, however, that if you make your galettes on parchment paper and then set the baking sheet on the stove to cool, you should not turn on an open flame right next to the sheet. I almost burned down our kitchen!

For the Pate Sucree:
2 cups (250gr) all purpose flour
2 tablespoons (25gr) sugar
pinch of salt
1 stick (113gr) butter, cut in small dices
1 egg
2-4 tablespoons cold water

In a large bowl, combine the flour, sugar and salt and cut in the butter with a pastry cutter or two forks until the mixture ressembles forms pea size crumbs. Make a well in the center and add the egg. With a fork, start working the flour in a little at a time and when most of it is incorporated, quickly mix the dough into a coherent and smooth mass, adding some cold water, a tablespoon at a time, if necessary (this varies depending on the humidity or altitude of where you live). Wrap the dough in plastic and let it rest in the refrigerator for 30 minutes.

For the filling:
6 or 7 large peaches, peeled, pitted, and sliced
1 c fresh blueberries
1/2 c packed brown sugar
1/8 tsp nutmeg
2 Tbs cornstarch
1 tsp Vanilla
1/8 c slivered almonds
Blogger's note- I added about 1 1/2 tsps of cinnamon

Combine peaches and blueberries in a large bowl. In a small bowl, combine brown sugar and nutmeg. Then add cornstarch, and combine well. Pour into bowl with fruit and mix. Add vanilla, and mix. Set aside.

To assemble:
Preheat the oven to 350F.
Roll the dough onto a lightly floured surface to 1/4 inch thick and cut three 6-inch rounds in it and place them on a parchment paper lined baking sheet. Fill the center of each round with the filling and crimp the edges towards the center. I don't like to cover the fruit that much with the dough but that is a personal preference. Brush the crust with egg wash and sprinkle with the remaining sugar over the galettes. Bake for 15-20 minutes or until golden brown.
(Blogger's note: I have no idea where she got that number. Both times I made it it was closer to 35 minutes, and it didn't even get very brown in that time.)


Tuesday, August 18, 2009

Bagels II: Because We Still Don't Live in NYC

So, we still don't leave in New York City, which is, in my opinion, the only place where one can really get good bagels. So, I decided to try again to make bagels that tasted more like the bagels I know and love. Not that my first batch wasn't good (they were), but they lacked some of that classic bagel flavor.

This recipe, which I got on Smitten Kitchen and is from Peter Reinhart, comes much closer to an NYC bagel. Some of the differences are that this bagel is made with a sponge that is allowed to rise and then ingredients are added to it, there is malt syrup in the recipe which gives is a bagel-y flavor, and the bagels are retarded in the fridge overnight. Yes, this is a two day process.

Despite baking soda in the water, my bagels still came out flat. I'm not sure why that is. Any suggestions?

You can find the bagel recipe here. I would say that if you live anywhere near where you can get a good bagel, it might not be worth making your own. Then again, if you live far away from bagels like me, you might seriously consider devoting two days to the bagel-making endeavor.

Friday, August 14, 2009

Plain Jane Plain Cake


We're going to try something a little different today and open today's post with a movie review. No, it's not for G.I. Joe, despite that cinematic masterpiece's obvious relevance to this blog. Rather, it's for Julie and Julia, which I saw on Sunday and Rebecca is going to see soon. I would highly recommend it for anyone who likes to cook, bake, eat or produce estrogen. It's the rare Hollywood movie about women where the main topic of conversation isn't men, and it will make your mouth water! Meryl Streep is incredible as Julia Child; Amy Adams, while okay, kind of gets chewed up in the jaws of Meryl's awesomeness. Oh well, that's what happens when you play in the big leagues. It inspired me to cook my way through Dorie Greenspan- a bout of inspiration that wore off pretty quickly when I remembered that I go to college, but still.

Speaking of Dorie..on to the post! So here's the deal. I really love blueberries. They're my favorite food, and I think it's genetic, since my dad also loves them (and so did Simon, last time I checked). So when I came home from Julie and Julia and was rooting around for recipes (Mastering the Art of French Cooking is a classic cookbook, but a) it's not great for anyone that keeps kosher and b) it's not stellar on desserts), I came across Dorie's Blueberry Brown Sugar Plain Cake and made it the very next day.

I have to say, I was kind of disappointed. But to be fair, a lot of the disappointments were my fault. Our house has really fallen into baking disrepair since I was in Pennsylvania, and I came home to find no unsalted butter, no light brown sugar and only two eggs of an indeterminate expiration date. Lame. Still, I soldiered on, and the cake wasn't bad. It just wasn't great.

I thought it came out too thin, which was once again my fault- the recipe calls for an 11 x 7 pan, and I didn't have one so I used a bigger one. Hence, thin cake. However, the recipe also calls for a pint of blueberries, and I thought that was way too much. I didn't even put in a full pint (I was nibbling at them in their container- sue me), but it was a kind of overwhelming amount and sometimes the cake threatened to fall apart because the blueberry-to-crumb ratio was too much.

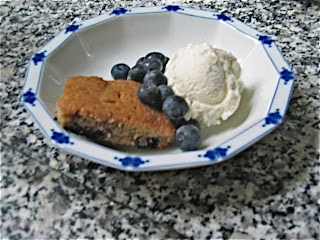
That said, there were good things about this cake as well. I made it on Monday, and today (Friday) it's still really moist and not at all stale. The brown sugar flavor is strong and unique. You can have it for breakfast, or serve it with vanilla ice cream as a dessert (yum yum yum! I highly recommend). It is, as its name states, a plain cake, and it's pretty versatile but nothing too special.

But never fear, dear reader(s?). I went to the Farmer's Market today and bought a whole mess of blueberries. Tonight- Maida Heatter's blueberry crumble!

Tuesday, August 11, 2009

Hostess-ish Cupcakes

So, one of my favorite desserts is the cupcake, and one of my favorite cupcakes is the Hostess Cupcake from Crumbs Bakery (or as Sarah and I call it, Evil Crumbs -- long story involving some bad customer service, but we do love their cupcakes, so it is a conundrum). Anyway, since there is no Crumbs in Texas, Rebecca had to resort to making her own.

First, I made Dorie Greenspan's Chocolate Chocolate Cupcakes from pages 215-216 of Baking From My Home to Yours. Just Google them to find the recipe. It is everywhere. I may have over baked them, as they were kind of dry, but they had a yummy chocolate flavor.

After cooling the cupcakes, I then filled them with this recipe that I found on Baking Bites:

Vanilla Cream Filling
3 tbsp all purpose flour
1/2 cup milk (low fat is fine)
1/2 cup butter (or trans fat-free shortening)
1/2 cup granulated sugar
1/2 scraped vanilla bean or 1 tsp vanilla extract

Whisk together the flour and milk and cook in a small saucepan over medium heat until thick. This will only take a few minutes. Sir continuously to prevent the mixture from clumping and do not bring all the way to a boil. When thickened (consistency will be that of a thin pudding or custard), strain with a mesh strainer into a small bowl, cover with plastic wrap and let cool completely to room temperature.
When the milk mixture is cool, cream the butter (or shortening) and sugar together in a medium bowl until light. Add in the milk/flour mixture and the scraped vanilla bean seeds (or vanilla extract) and beat at high speed with an electric mixer for 7 minutes, until light and fluffy. Scrape into a pastry bag fitted with a plain tip, or a large ziplock bag with the corner cut off, and set aside until ready to fill your cupcakes.


In this case, I was afraid that it would not make enough icing, but it whipped up nicely. Also, I am not that good with the pastry bag, but every cupcake had filling. However, there was not enough left to make the Hostess squiggle. Next time, I would make 1.5 times the recipe.


After filling them, I glazed them with Dorie's recommended glaze. The glaze was much better at room temperature, than after I stored them in the fridge (I live in Texas, it gets hot here). After being in the fridge, the glaze was too hard for that true Hostess taste.


All in all, these were good cupcakes, but I am still searching for a way to replicate the Crumbs Hostess Cupcakes. The cake needs to be moister and the frosting needs to be...different somehow. Not sure yet. Let me know if you have any thoughts.

Thursday, August 6, 2009

Adventures with the Ice Cream Maker: Lemon Sherbert (and cookie sandwhich)


So, we are doing well with our ice cream maker. We have made some yummy ice creams, but this one was so good, we had to blog about it. It is Lemon Sherbet from David Lebovitz's Perfect Scoop. Delicious on a hot summer night -- very lemony and refreshing. You can find the recipe here:

Lemon Sherbet
- makes about 1 quart (1 liter) -
Ingredients
3 cups (750 ml) whole milk
3/4 cup (150 g) sugar
1 lemon, preferably unsprayed
6 tablespoons (90 ml) freshly squeezed lemon juice (from 2 to 3 lemons)
Procedure
1. In a medium, nonreactive saucepan, mix 1 cup (250 ml) of the milk with the sugar. Grate the zest of the lemon directly into the saucepan. Heat, stirring frequently, until the sugar is dissolved. Remove from the heat and add the remaining 2 cups (500 ml) milk, then chill thoroughly in the refrigerator.
2. Stir the lemon juice into the milk mixture. If it curdles a bit, whisk it vigorously to make it smooth again. Freeze in your ice cream maker according to the manufacturer's instructions.

But wait, there's more...

Then, one night, we had a brilliant idea...to pair this lemon sherbet with Dorie's molasses cookies (which Sarah promises to blog about soon). Delicious combo -- the sweet, tart lemon and the spicy ginger were a perfect pair. Seriously, you should make this!


Monday, August 3, 2009

Bagels: Because We Don't Live in NYC Anymore


Ah, dear readers, Rebecca now lives in Texas. Texas has many things, but good bagels are not one of them. As people who were born and raised in New York City, there is a particular way that a bagel is supposed to feel and taste and it is really NOT just like white bread with a hole in it. The outside should be crispy (but not too crispy) and the inside should be chewy, with that special bagel flavor.

These bagels were from a great blog called Baking Bites, which you can find here. Like many of the people in the comments section, my bagels came out kind of flat, but still delicious and tasted a lot like bagels. I think I will try again with some baking soda in the water, as a number of other recipes suggest. These were a little unusual as far as bagel recipes go, since it does not recommend malt syrup, which many people say is essential for that bagel flavor. The next recipe I try will be with malt syrup, since I just found some at the store (I plan to make a few different recipes, for comparison).

All in all, these were good bagels. Certainly better than anything we have here, and everyone seemed to enjoy them. See...


Simon enjoying his bagel.

Mozart and Peanut Butter


One of the many, many wonderful things about living in New York City is the gobs of free culture floating around everywhere. Gobs! Among my favorite of the aforementioned gobs is the annual concerts in the park, hosted by the Metropolitan Opera and the Philharmonic. Unfortunately, I was away this summer for the opera concert, but thanks to a handy bout of swine flu, four friends and I found ourselves in Central Park on a perfect night, listening to some Mozart and having a lovely time.

"But wait, Sarah!" you say. "What does this have to do with baking?" Patience, grasshopper. Bringing a picnic dinner is a time-honored tradition at the concerts, and in addition to the usual spread from Zabars, we made Dorie Greenspan's Peanut Butter Criss Cross cookies. And just as, once upon a time, Rebecca and I put peanut butter cups into chocolate chip cookies, so too did we insert chocolate chips into these peanut butter cookies. What a vicious, delicious cycle.

These cookies were great! They managed to avoid the usual peanut butter cookie traps of either being too dry or being so rich that you gasp and beg for a glass of milk whenever you take a bite. That said, they were kind of annoying to make. Luckily, I had several lovely assistants to do the criss-crossing with the forks, which is definitely the most time-consuming part of the process. Make them with a friend, make them for a picnic- just make them!
Related Posts with Thumbnails